How to Set Up Provider Dashboards
In this help article, we will show you how to set up your provider dashboards so that you can track each provider’s metrics such as:
Production per hour, day, & visit
Total production and production type breakdown
Collections
Hygiene Re-appointment Rate
Lost chair time
Hours they were idle
Diagnostic rate and case acceptance rate
Broken appointments
Before we get started, please note this is all available in our Practice Analytics module and is only available to Dentrix, OpenDental, Cleardent, Tracker, and Eaglesoft customers for now. These features will be available on PracticeWorks, PracticeWeb, Dentrix Ascend and EZ Dental soon.
How to get started:
Set Team Settings
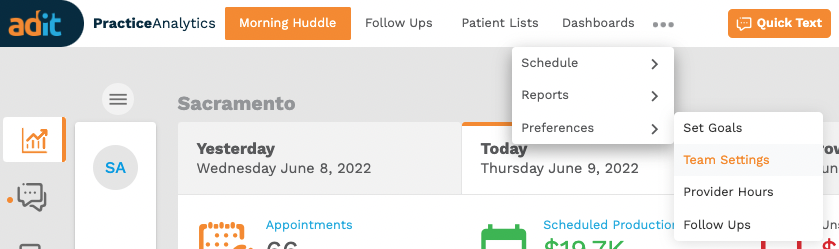
Navigate to the Practice Analytics module.
In the top navigation menu, hover over Preferences, if you don’t see this option in the menu click the three dots to view the rest of the menu options, and click on Team Settings.
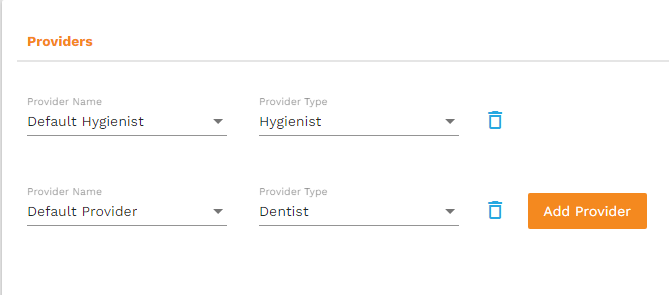
Under the Providers section, enable all the providers in your practice by selecting them in each dropdown under Provider Name and label them if they are a dentist or hygienist under the Provider Type dropdown.
Click Add Provider if you need to add more providers
Click the Trash can icon to remove any providers.
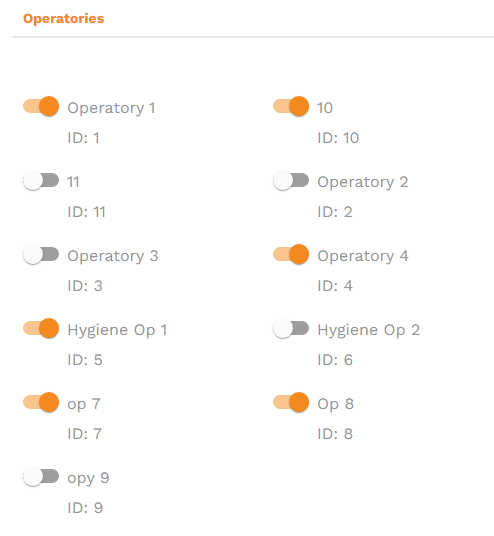
Under Operatories, enable all the Operatories that are used in your practice. Click the toggle switch to turn the operatory on or off.
If the switch is gray with the button to the left, it is off.
If the switch is orange with the button to the right, it is on.
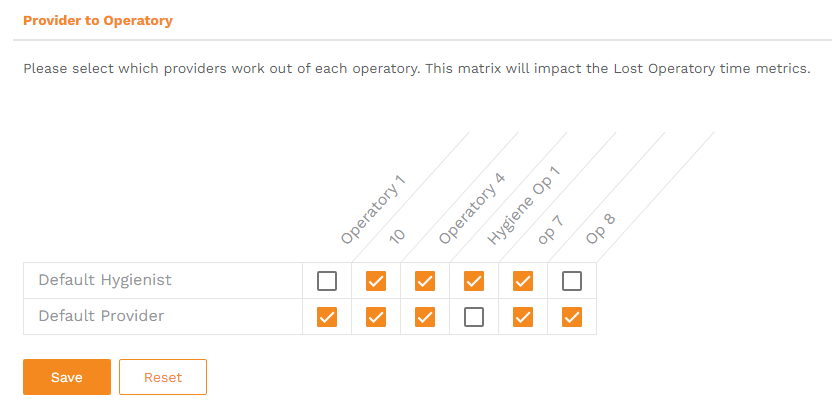
Under the Provider to Operatory section, complete the matrix grid by associating the operatories that each provider works in.
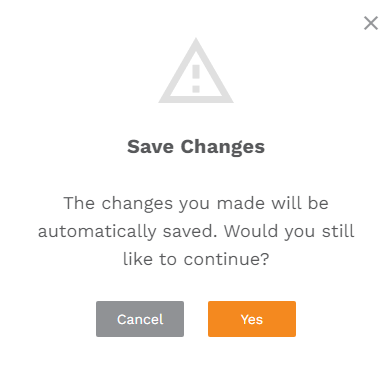
Click on Save.
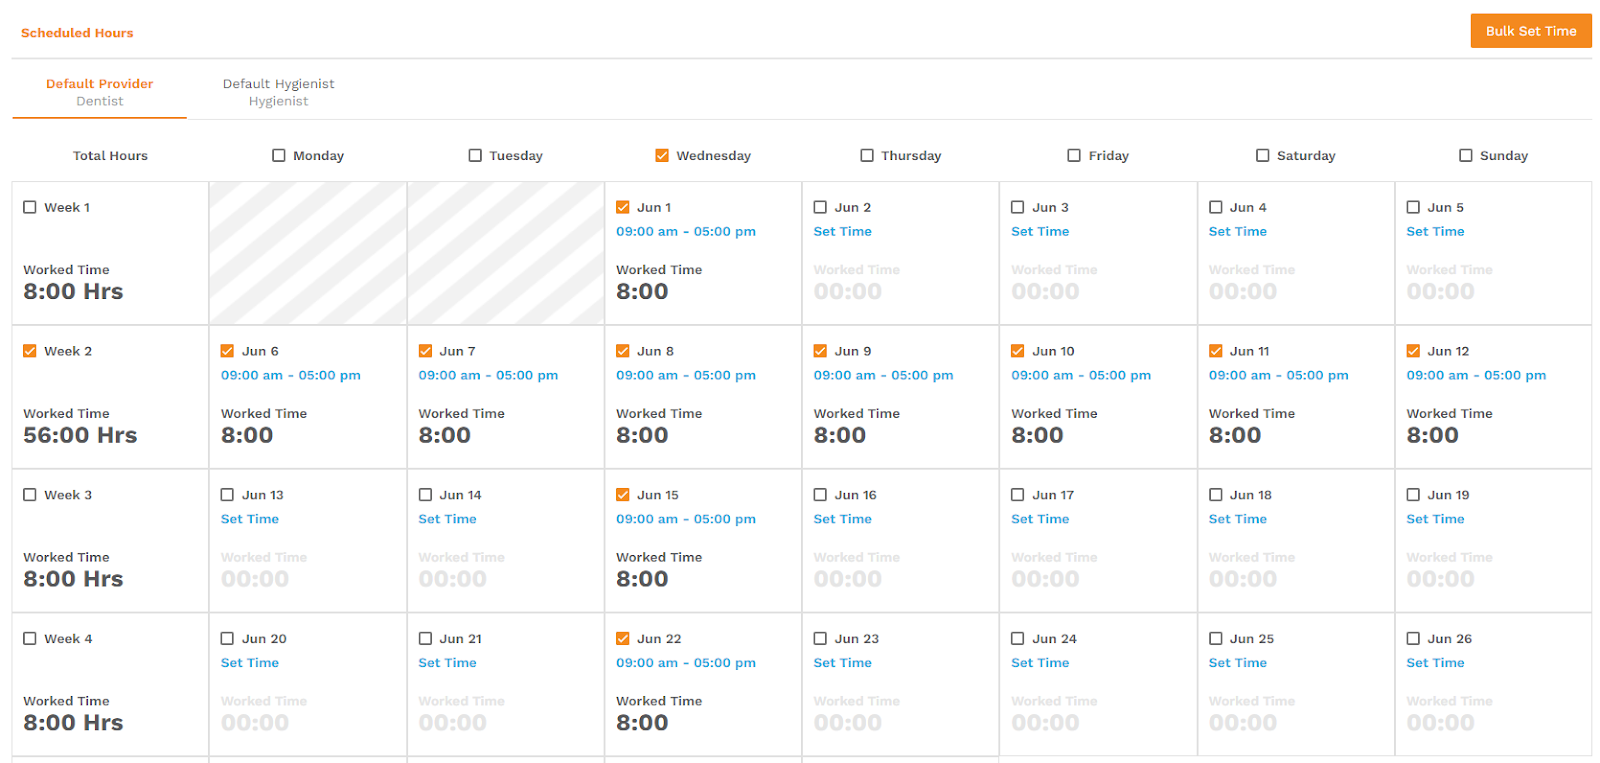
Set Provider Hours
- In the top navigation menu, hover over Preferences, if you don’t see this option in the menu click the three dots to view the rest of the menu options, and click on Provider Hours.
On this page, you will need to add each provider’s hours that they worked. Click on the Set Time button and on the pop up, add the starting time and end time. Click on Save.
If there is a lunch break, you will need to split the scheduled hours in the pop up. Click on +Add to add another row. The first row will be the hours before the lunch break, and the second will be the hours after the lunch break.
Example:Repeat this process for each day individually, or by bulk (this can be done by clicking on the check boxes of multiple days, rows for the weeks, or columns of specific days and then clicking on Bulk Set Time).


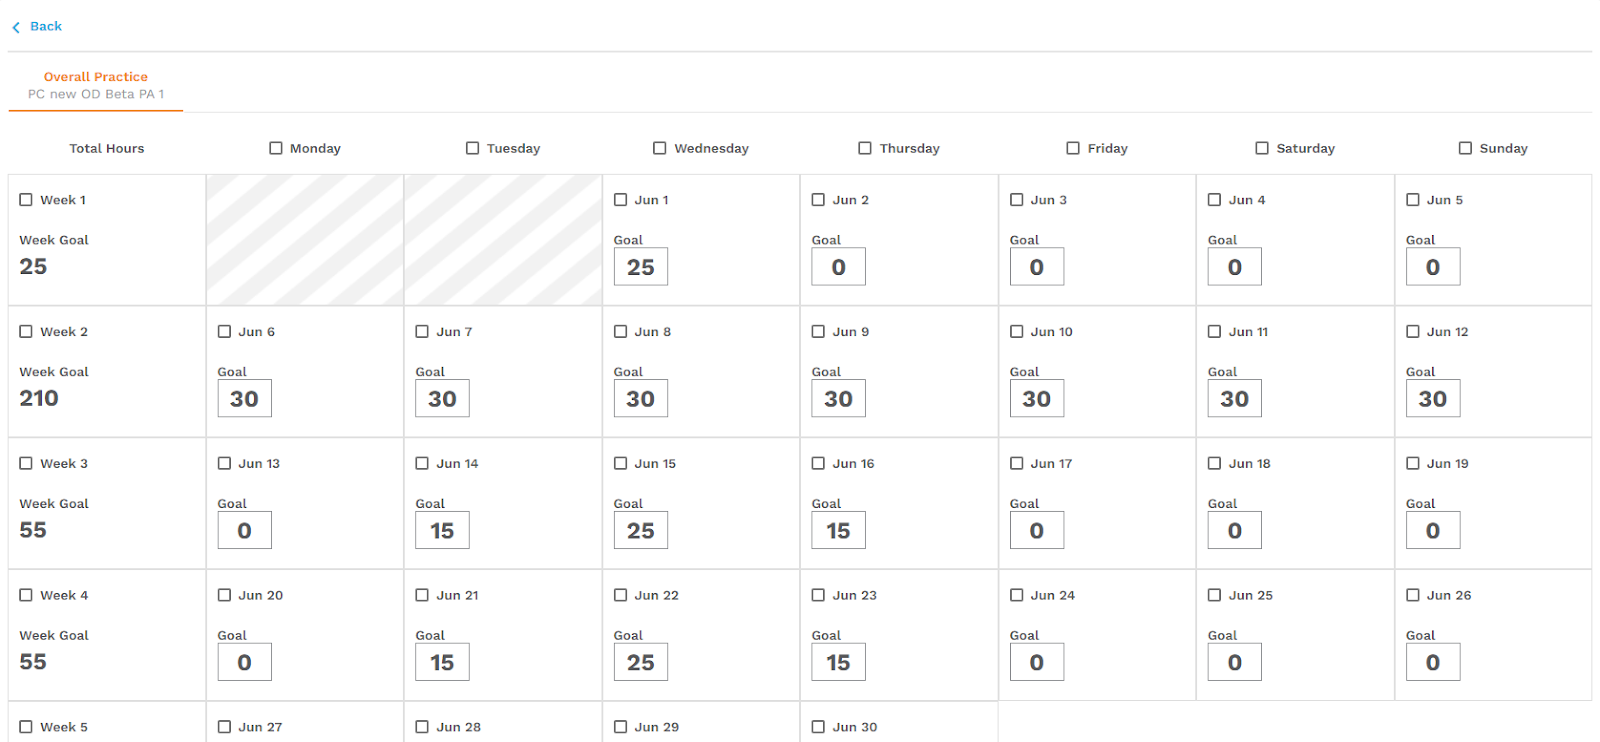
Set Team Goals
In the top navigation menu, hover over Preferences, if you don’t see this option in the menu click the three dots to view the rest of the menu options, and click on Team Goals.
On this page, you will input the goals you want to achieve for each provider by filling out the fields in all sections.
If you want to make goals for specific days, enable the Advanced toggle and click on Edit Settings. On the pop up click on Yes.
On this calendar, input the goals for each day. Alternatively, you can bulk set up the goals by clicking multiple days, rows, or columns. Then click on Bulk Set Goal. Enter the goal for the multiple days selected.
Once all the needed dates have a goal inputted, click on Back on the top left corner.
Once all goals for all providers have been entered, click on Save on the top right corner.


Related Articles
Edit provider rules for booking appointments online
Make online scheduling easy for your patients and for your staff by configuring your operatories and providers. This will ensure the correct services are booked into the correct spots on your schedule, with the correct providers. Note: Advanced ...How to set up the microsite
With the microsite, you can send patients an easy link to go schedule their next appointment. You can send this link via SMS, email, or add it on your website. To set a Receptionist Email: Navigate to the Online Scheduling module. In the top ...Set up email notifications
To set up a email notifications: Click on the Settings gear icon in the top right corner of your Adit platform. In the My Profile menu, click Notifications Based on the type of email notification you would like to receive, click on Add Notification ...Set Up Adit Pay
Adit Pay allows you to collect payments from your patients both online and in the office. The registration process is entirely self-guided, so you can sign up at any time! Please note that only Owner-Level users can set up the account. To set up your ...Set up browser notifications
Browser notifications are easy to set up but many times can be delayed because of different tabs and processes running on your browser. We do not recommend enabling browser notifications unless notifications are not a time-sensitive need for your ...