How to Create A Form
Creating patient forms for your practice provides a great level of customization and allow for mapping to specific patient information such as basics like first and last name, and can range to updating medications and allergies tied to the patient file.
To create a patient form, navigate to the Patient Forms module, select Forms Manager, then click Create Form.
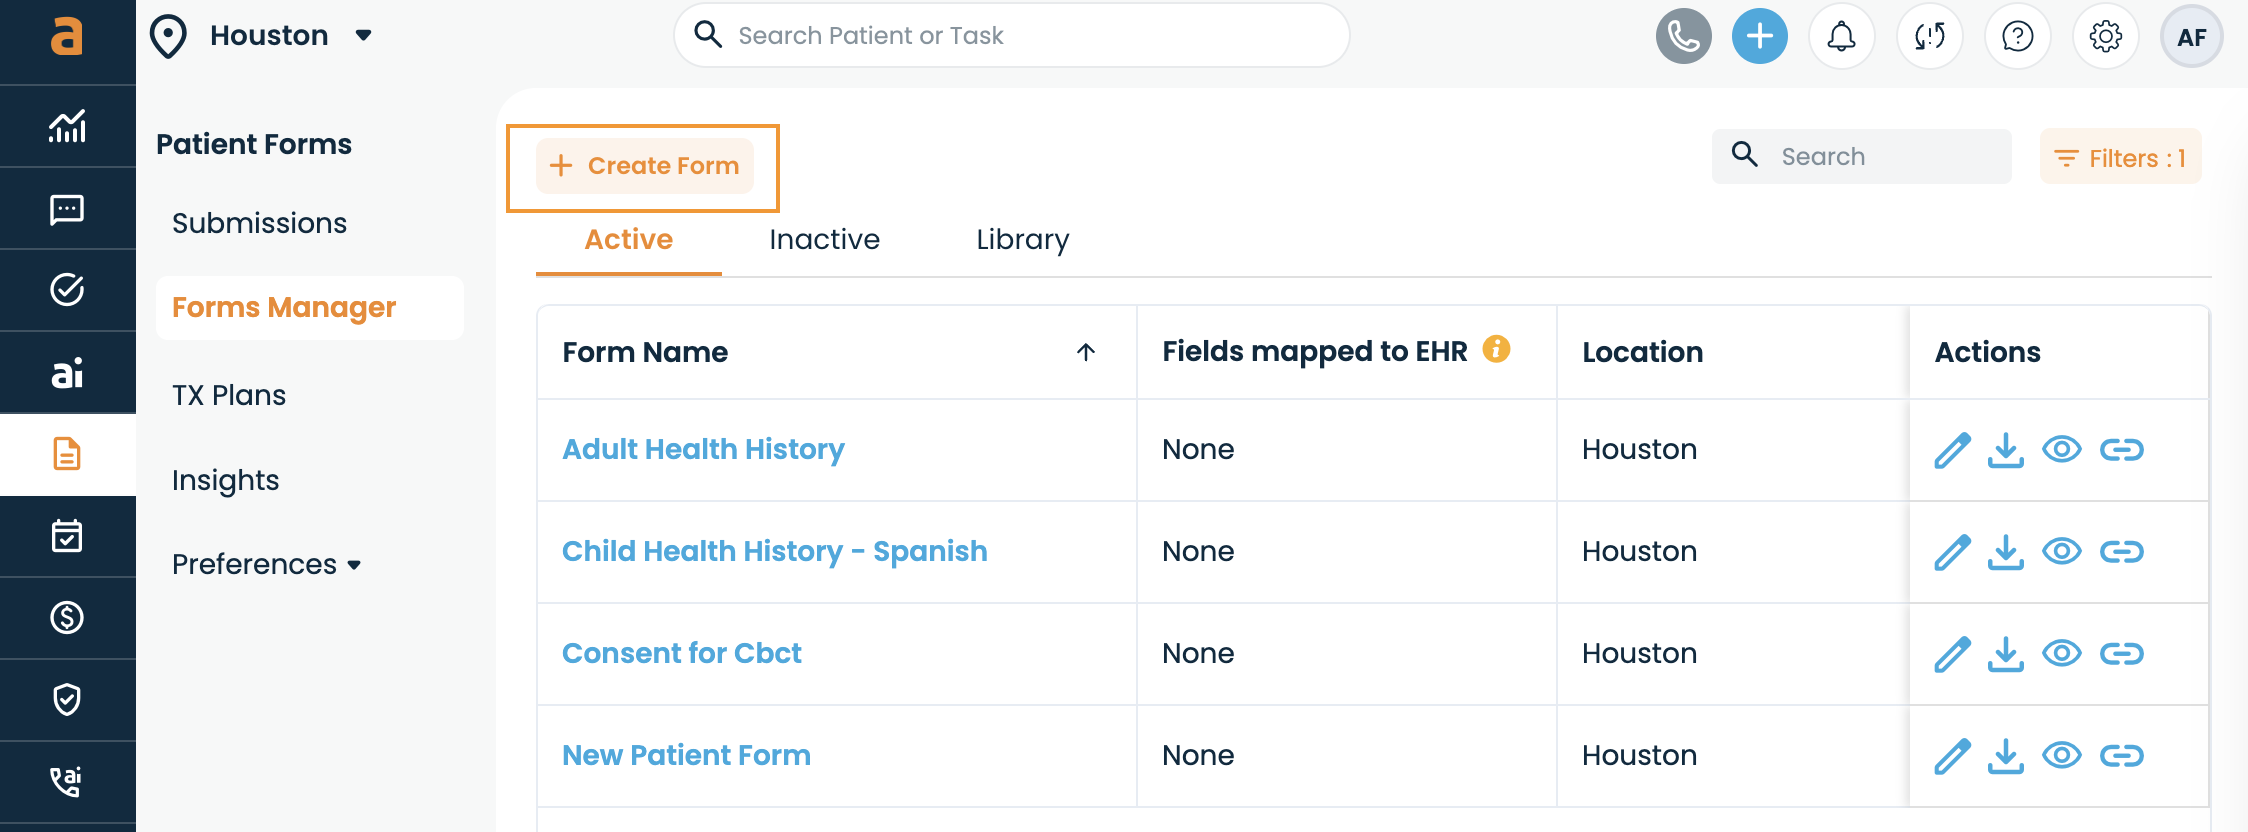
First, you'll need to select which location you're creating the form for. If already under the desired location, this will be pre-filled.
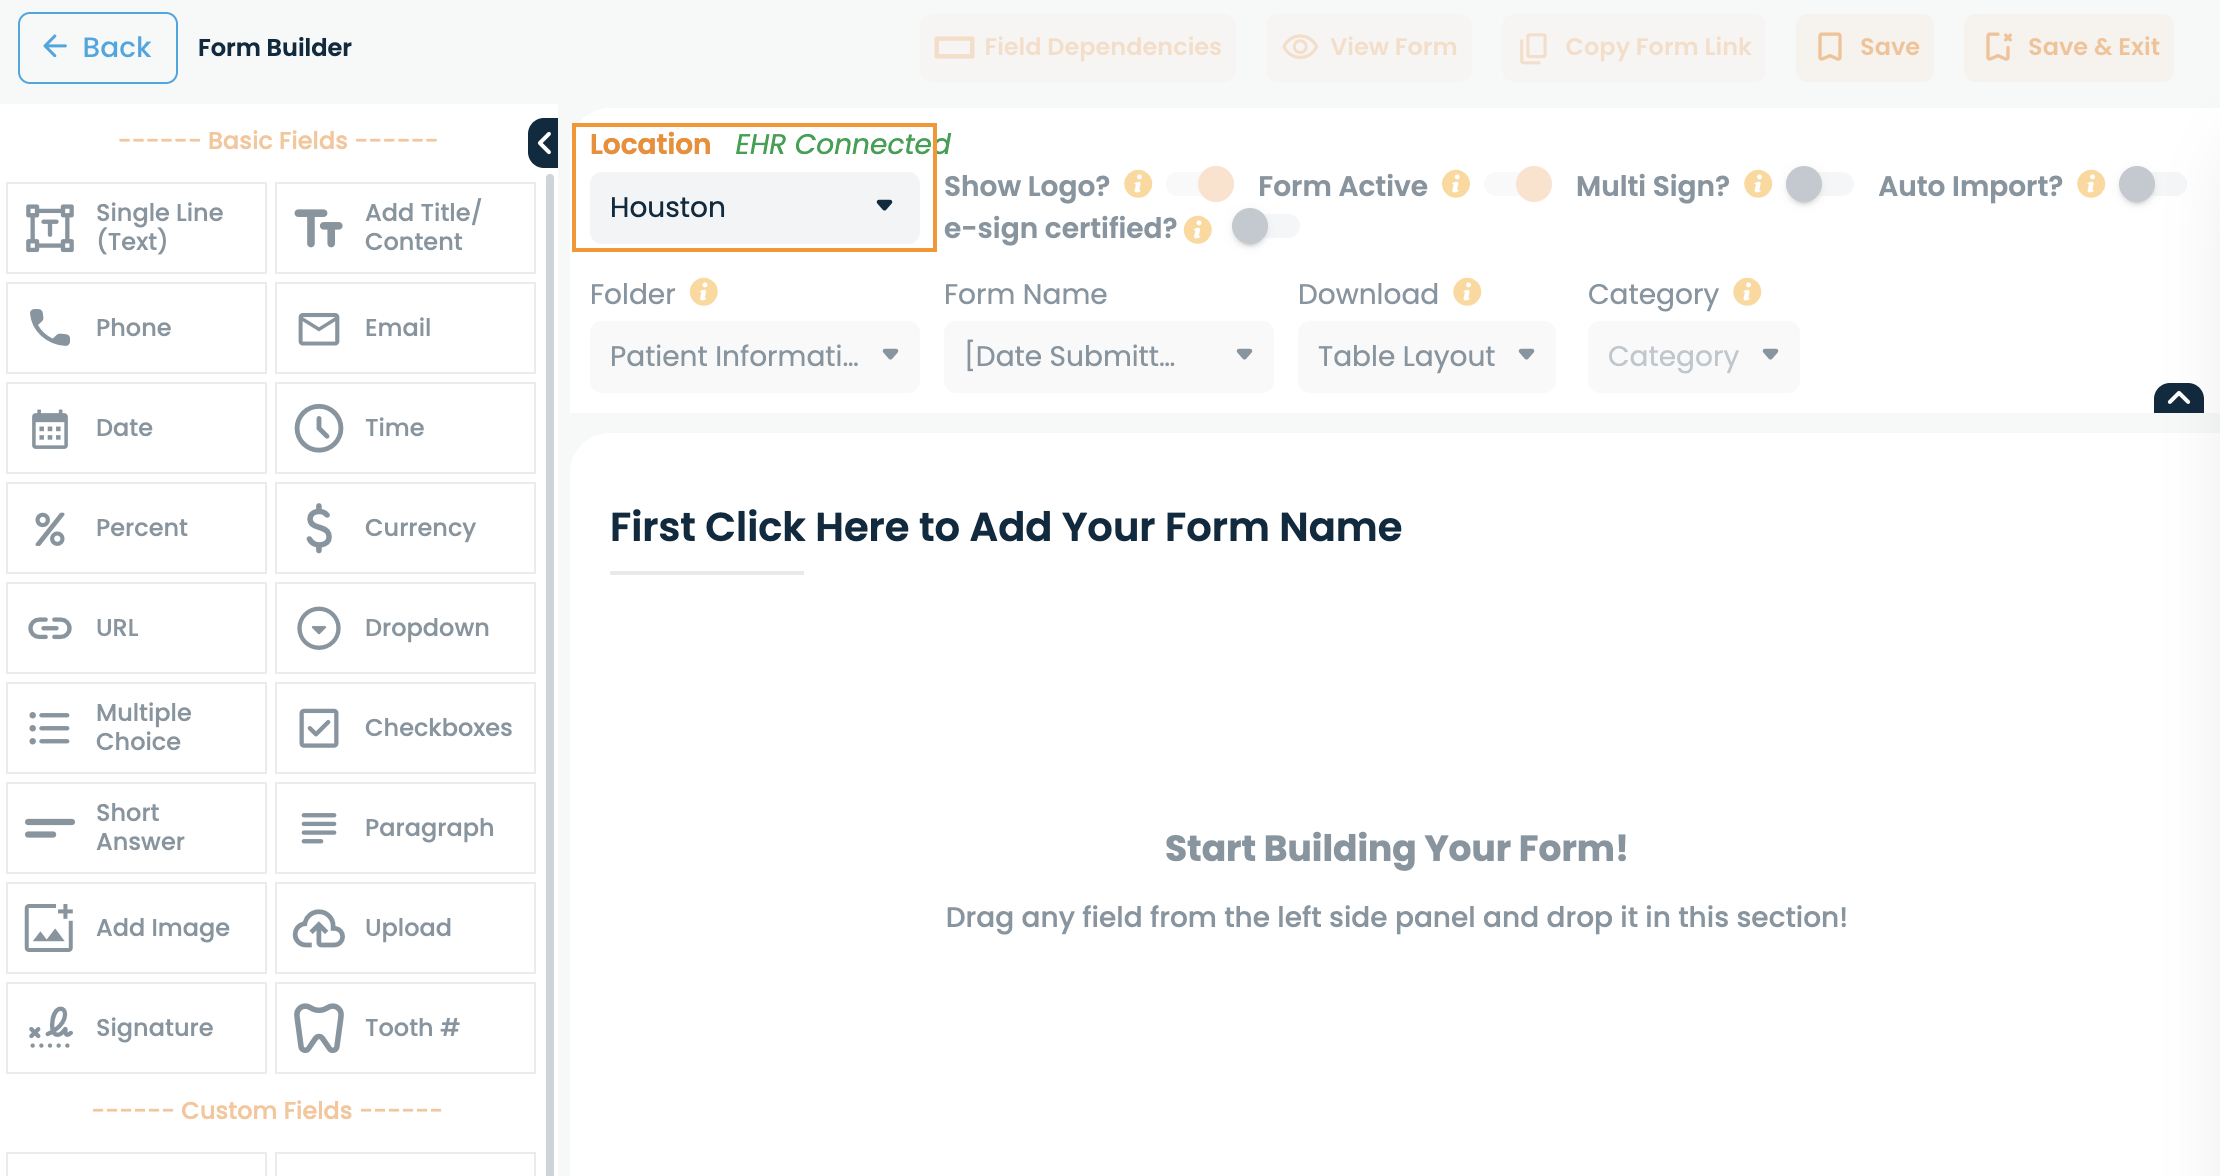
Then you'll need to title your form and if enter a description of the form if desired.
From here, we'll go to the top panel. You can customize the following:
- Location - This is the location you'd like to have the form appear under
- Show Logo - This toggle is to choose whether or not you want the practice logo included at the top of the form
- Form Active - This toggle is to choose whether the form template is active within Adit and able to be sent to patients
- Multi-Sign - This toggle is to choose whether the form will require a signature from someone within the practice
- Auto-Import? - This toggle will automatically import the form into your EHR when a patient submits it
- e-sign Certified? - This toggle will require a patient to provide their phone, name, and email when e-signing.
- Folder - This is the folder you would like to sync the forms into once the form has been approved (These generate based on what you have created within your EHR)
- Form Name - This is the name of the form that will appear within Adit and on the form.
- Download Format - This will change the format when downloading the .pdf of the form
- Compressed Layout - This layout compresses the information to reduce the number of pages. Recommended for virtual storage for keyword searchability
- Table Layout - This layout creates a two-column format the creates a consistent viewing experience. Recommended for staff viewing as the information is in an easy to read format.
- Large Print Layout - This layout creates the pdf to reflect exactly as it appears to the patient. Recommended for forms in which the practice intends to print out a form to give the patient a physical copy.
- Category - This will allow you to categorize the form along with other like forms
From the left side panel, you can add any field or segment to your form by dragging and dropping it into the middle panel.
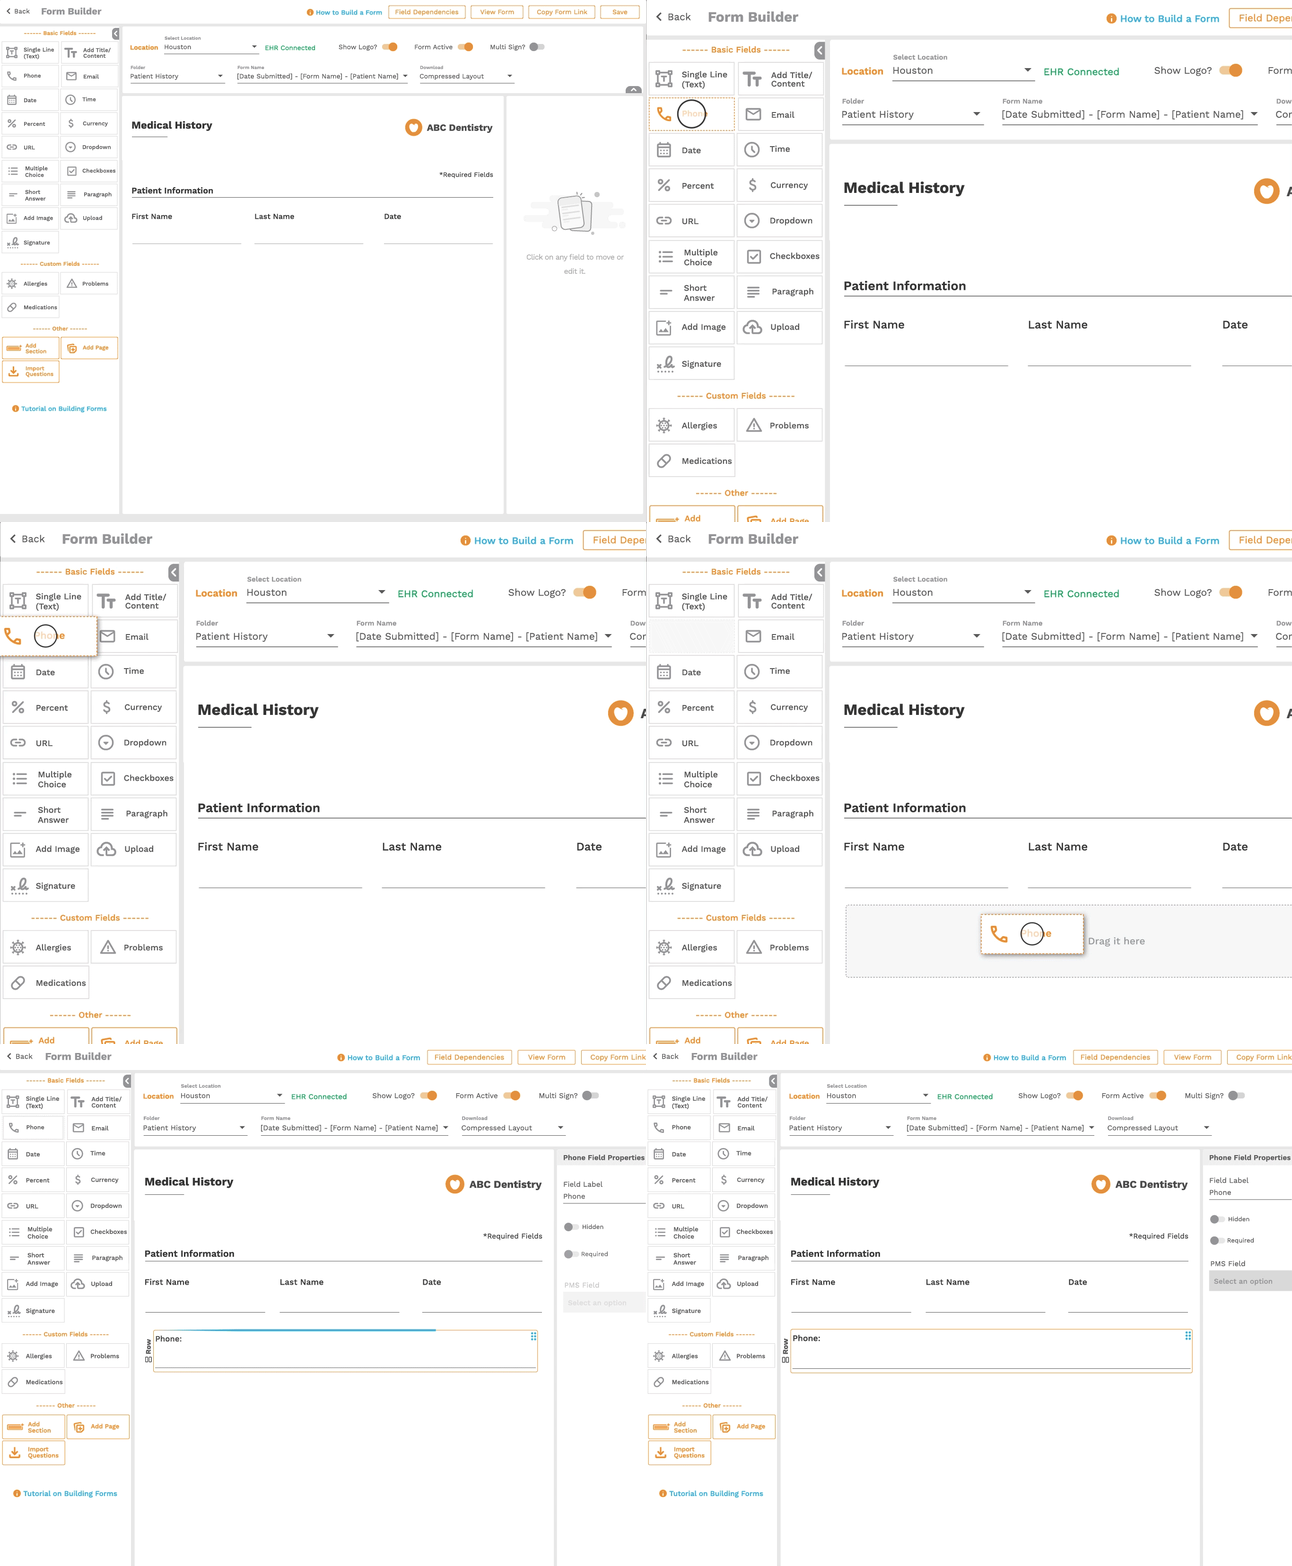
On the right side panel, you can manage the field properties, and map any applicable field back to the Patient Management System.
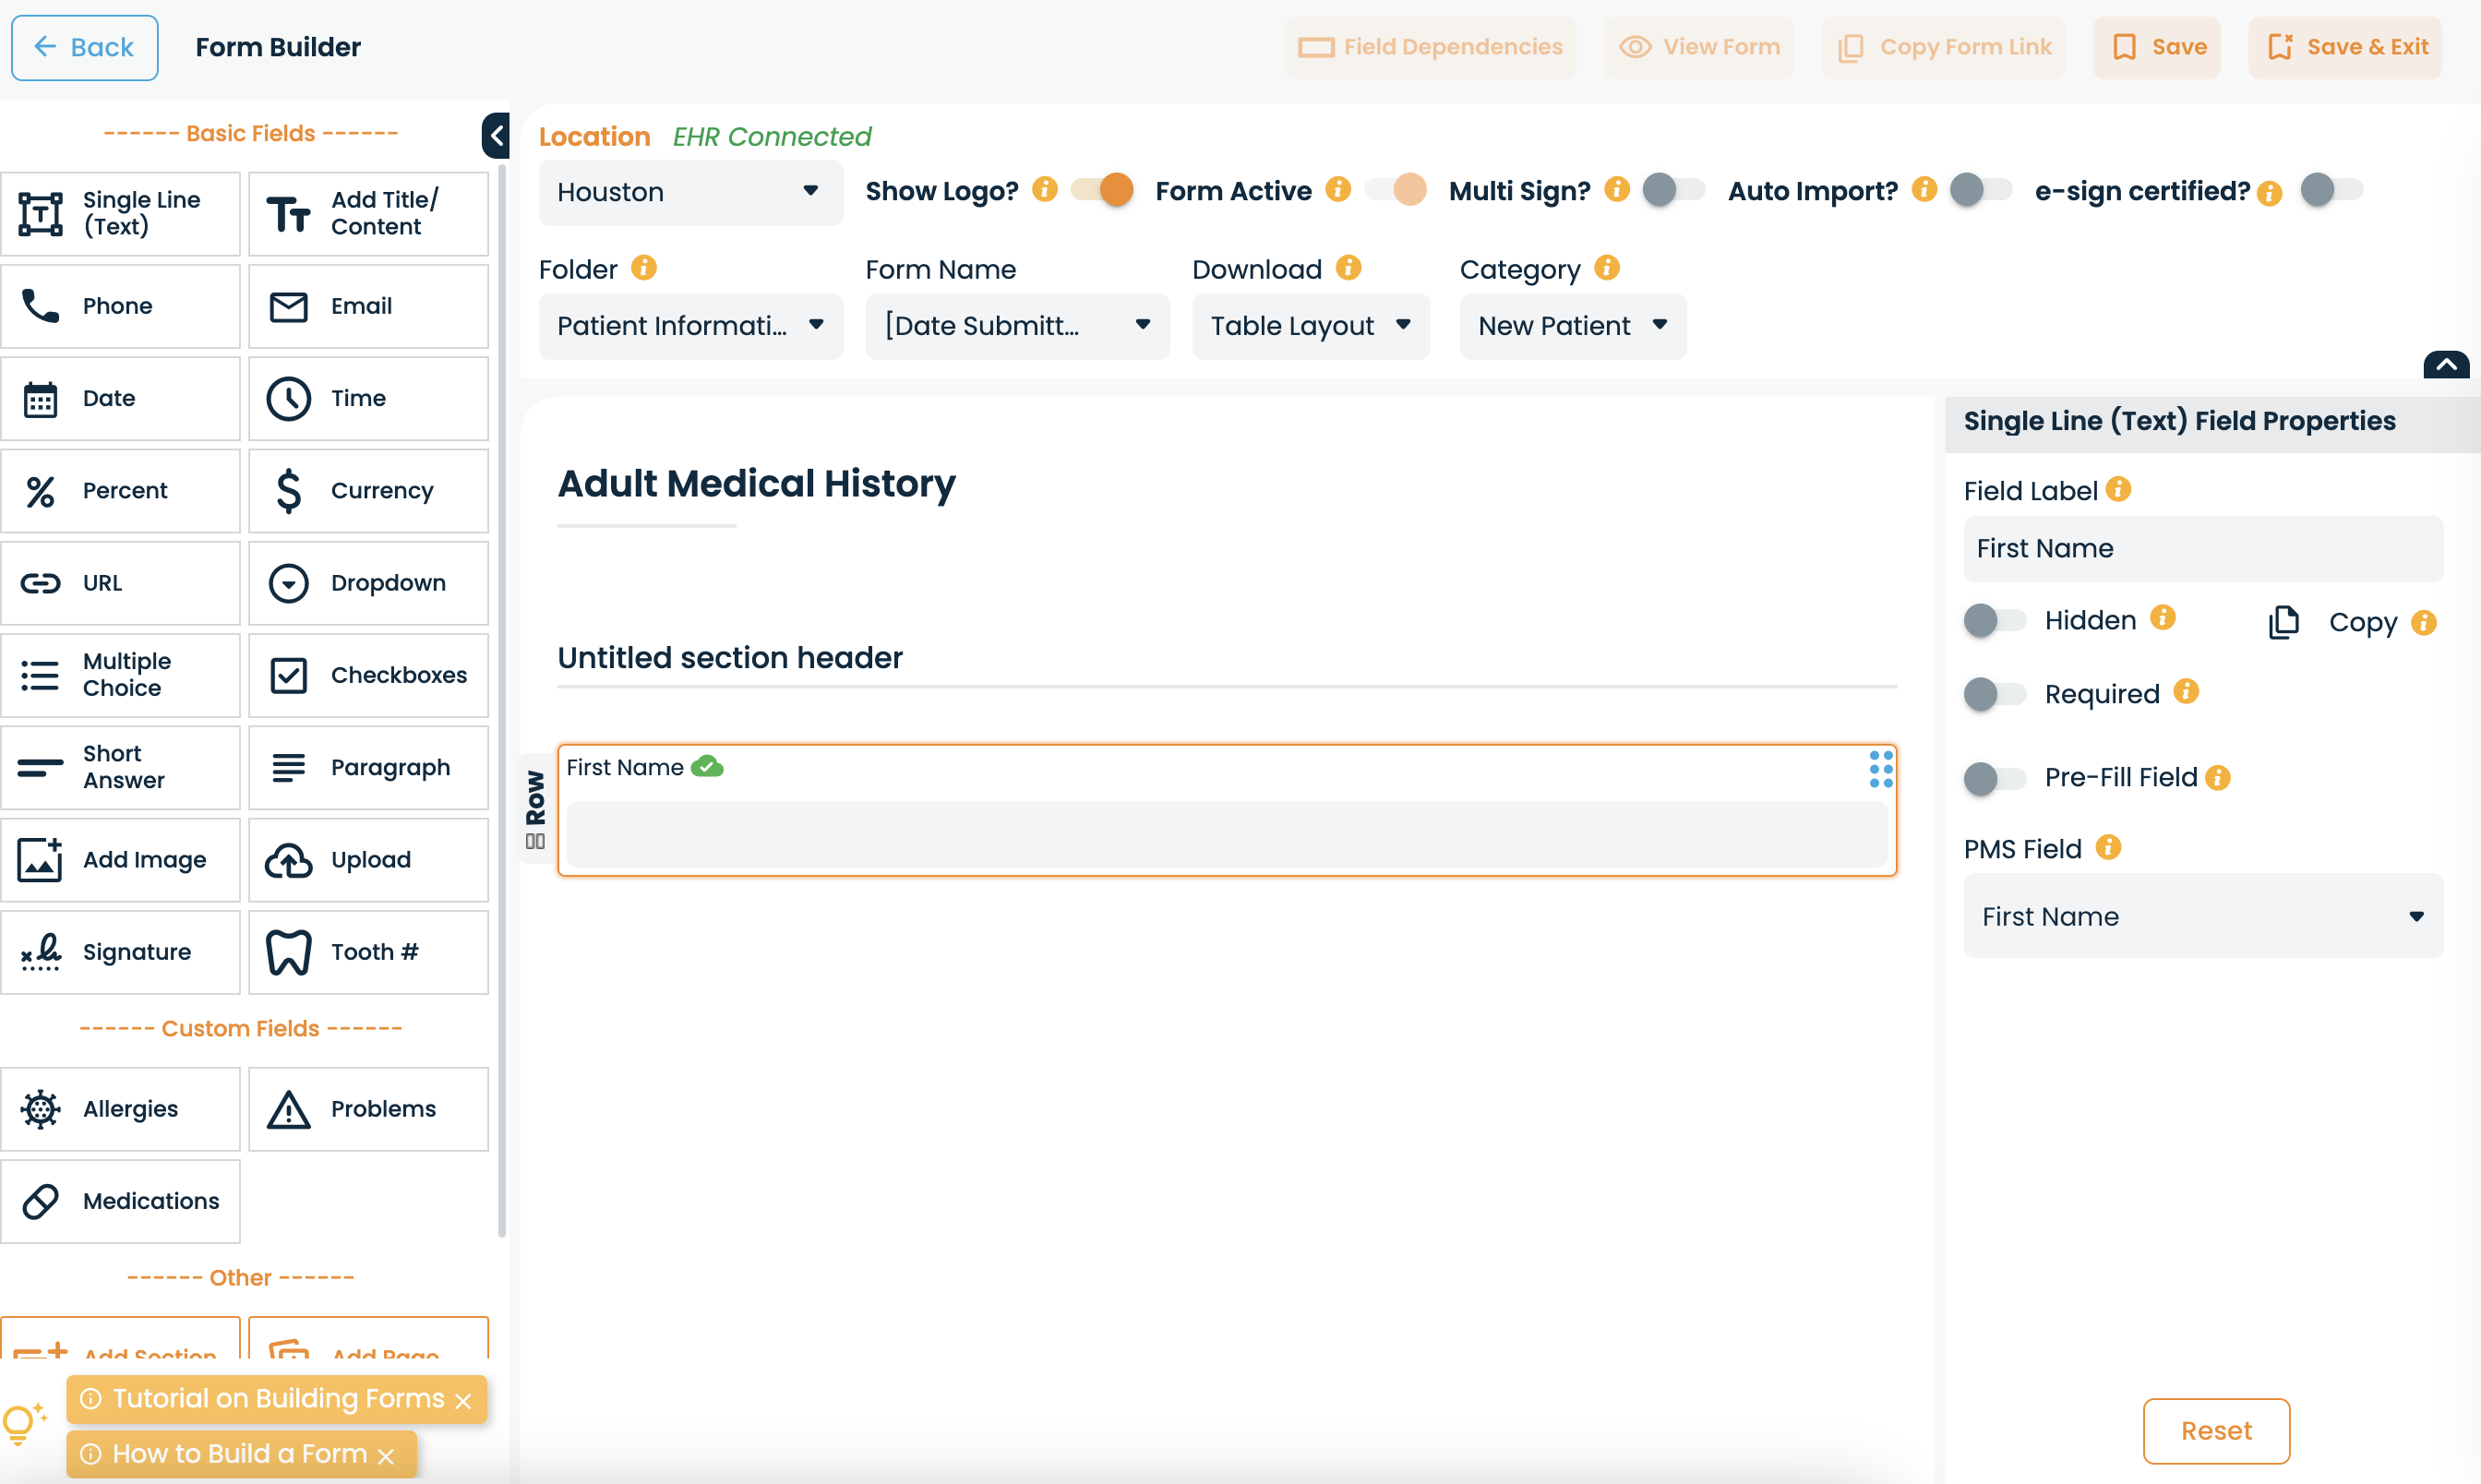
You can move around the fields on the form by dragging and dropping it in the desired section.

Note: A maximum of three fields are allowed per row
Once you have finished customizing your form, select Save, then select View Form to see how it looks.